Showing posts with label sewing. Show all posts

DIY: personal tissue holder

I always have tissues on my person, stuffed in my sleeves, shoved in a backpack, or littering my handbag. How much nicer would it be to have my tissues in an organised decorative especially made holder to slip into my bag? I decided to make one for myself, it took less than ten minutes, easy to make takes a teeny bit of fabric, and can be made different ones to match your bag, your stationery, your décor! 

They are so quick to make you could make heaps and give them as gifts or use them to sell at fund raisers and fêtes. If you don’t sew.... and here is a plug for my store... i make these and sell them in my etsy store and via my facebook page and am happy to take custom orders.

Here is how to make a tissue holder for your tissue stash!

Cut two rectangles of fabric, you can use matching or contrasting fabric whatever you want to! I used a bright yellow and orange floral print as my lining fabric, and a blue polka dotted fabric as my outer fabric.

The  rectangles need to be about 16.5 cm * 14 cm(you need to alter this according to the size of your mini tissue pack as some are larger than others!).


  • With face side in, sew all around the rectangle with about 0.5cm seam leaving 2 cm un-stitched. 
  • Turn right side around, and iron flat,. Ironing helps to keep the project neat and makes it easier to sew as there are no bubbles or creases in the fabric to mess up your straight lines!
  • Stitch around the rectangle, to close off the small opening, and to make all the sides uniform. In this example I chose a decorative stitch, however a straight stitch or hand stitching is fine as well.
  • with long sides horizontal, fold the fabric in half short sides together to provide a half way line, then unfold it, and fold the left side and right side up to the midway line. Iron and pin to make it easier to stitch.


  • Stitch across the short sides


  • Then turn the fabric the right way around, and put your small packet of tissues, or some loose tissues you have folded into the holder, and you are ready to use it!


Ideal to make for fund raisers, fêtes, or as a small gift! These tissue holders help to organise your tissues in your bag, and you could make other accessories, such as diary cover and draw string bags for makeup, in matching or coordinating fabric and have a set of items!


...................................................................................... Please visit me on etsy! www.etsy.com/shop/empressbat handcrafted gothic goodies at bargain prices. see me on etsy! www.etsy.com/shop/empressbat ...Please visit me on etsy! www.etsy.com/shop/empressbat handcrafted gothic goodies at bargain prices. see me on etsy! www.etsy.com/shop/empressbat

DIY: Easy Fabric Bunting

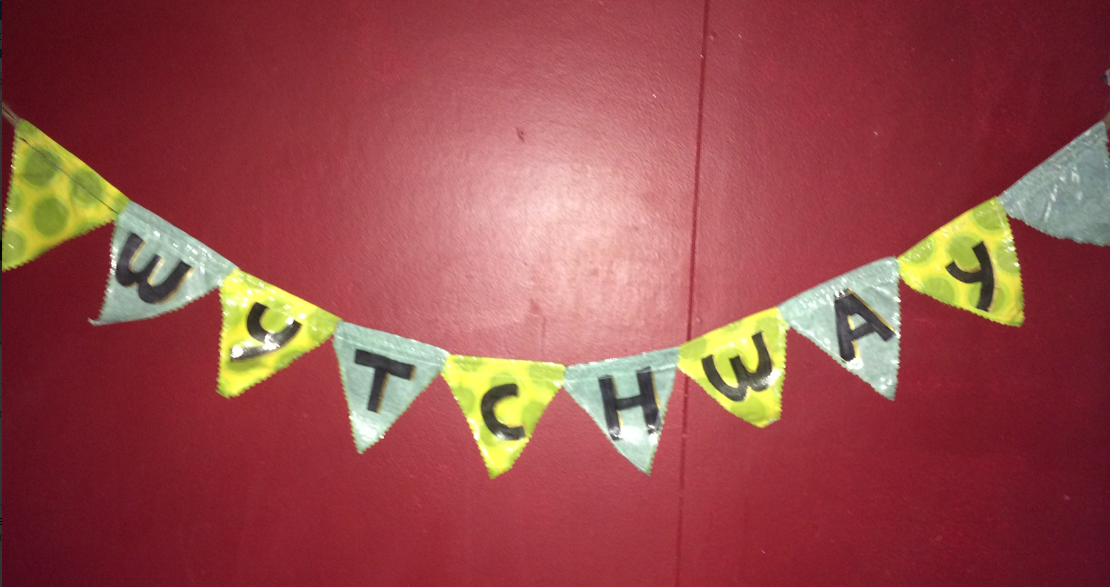
A few days ago, a friend of mine who has a market stall called Wytchway  was asking on facebook about where she could buy some waterproof fabric bunting to decorate her stall. 

If you are in the Dayboro Queensland area and interested in Wytchway's stall or to purchase from her online please have a look at the information on her facebook page.


I decided to attempt to make some bunting.
Just to see if I could.

Step 1

Created a template out of cardboard for the size and shape I wanted, allowing for the hem (to feed the string through)
cardboard template

Step 2

Drew around the template on the fabric and then hand lettered the 'WYTCHWAY' with a fabric ink pen

Step 3

Ironed fabric and then placed the clear fabric plastic coat stuff on it, covered it with baking paper and ironed on a low setting

Step 4

I cut out the triangles with sharp pinking shears (keeping my fingers well out of the way for fear I would end up with pinking shaped abrasions on my hands!)

I then sewed around them and sewed the hem in which the jute would go to string the bunting

Step 5

After each triangle was sewn I then threaded them with the jute to form the bunting. After all triangles were on the jute I pushed them closer together and did a zig zag stictch over the hems and the inserted jute.

I then went over each letter adding embellishment in the form of gold paint pen shading. (yes I AM ambidextrous which is why the top photo shows me writing with my right hand and this photo is my left hand)


The bunting is ready to hang!

My sewing machine is old and falling apart, i cant afford a new one at the moment, so it kept breaking the cotton. I think if my sewing machine worked properly i could have made this bunting so much faster, and with less expletives.

Remember this one is only a prototype. So excuse it looking a bit dodgy!

I think these could be improved if a stiffener was used such as stitching the triangles onto acrylic felt, or ironing interface on the back.

VERDICT: easy to make, so give it a go!


For teeny bunting, use washi tape and twine!
____________________ 

About Me: I work full time, I am also studying for a therapist qualification in Naturopathy specialising in Herbalism, I have a small craft 'business', I am co-admin of an auction page on facebook to help other small hobby businesses, i maintain my own 'store' facebook page, I blog at least once a week and I maintain a facebook page created to support small home businesses and hobby sellers 
............................................................................................................... ............................................................................................................... Please visit me on etsy! www.etsy.com/shop/empressbat handcrafted gothic goodies at bargain prices. see me on etsy! www.etsy.com/shop/empressbat ...Please visit me on etsy! www.etsy.com/shop/empressbat handcrafted gothic goodies at bargain prices. see me on etsy! www.etsy.com/shop/empressbat